How to Create, Host and Embed Videos in Power BI
Videos have the power to bring numbers on a page to life! They quickly create a shared understanding and deliver your message in a fraction of the time compared to text. So when we realised that we could combine our love for videos with Power BI - we just had to share how!
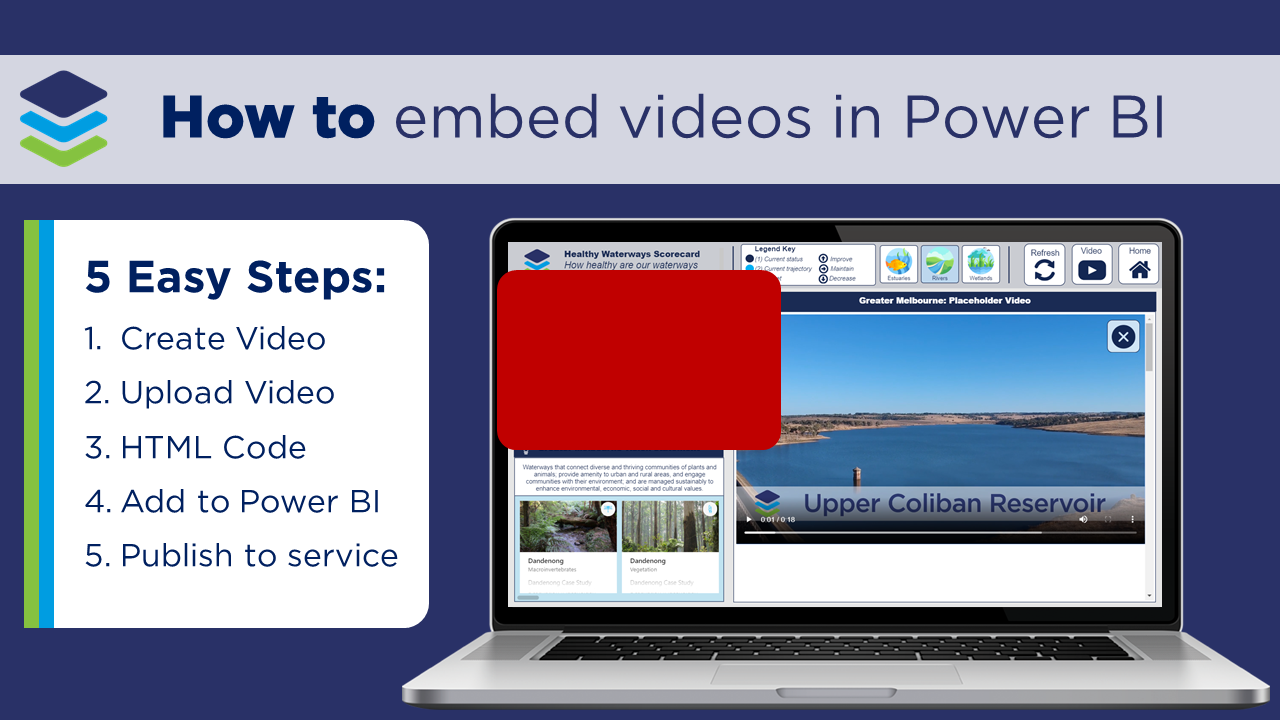
In this post we will show you how to create your own videos, host them online and embed them into your Power BI reports.
The two main reasons we love embedding videos into Power BI are:
Navigation: A short video can easily provide step-by-step instructions to help your users understand, navigate and get the most out of your Power BI reports - without any training! This really empowers your users, but it also saves you A LOT of time in the process!
Context: Videos can provide greater context on what the numbers mean. Whether it’s a site fly-over, customer feedback interviews, or a short summary of the project background and objectives, videos have the power to connect and engage with your users.
And in just 5 easy steps, you’ll be embedding videos inside of your Power BI reports in no time!
Blog Update (August 2020)
We were previously able to embed videos using the HTML Viewer custom visual. In mid-2020 this visual widely used by many members of the Power BI community was deprecated, and therefore unavailable to use in report creation. Lucky for us, the Power BI community is filled with AMAZING people who continuously go above and beyond to help make Power BI the leading analytics tool across the world.
One such individual is Daniel Marsh-Patrick, Microsoft MVP for the Data Platform, custom visual creator (check out his Small Multiples and Violin Plot visuals) and industry partner and friend of DiscoverEI - who generously gave up a weekend in June to create a new and improved version of this visual - newly named HTML Content. This visual is available via AppSource, and has the same functionality (plus more) compared to our previously beloved HTML Viewer. Daniel has some awesome updates in the works to enable report creators who have a bit of HTML coding skills to extend this visual and create ‘on the fly’ customised visual displays linked with the data, directly within Power BI. Watch this space!
On behalf of everyone in the Power BI community who love embedding HTML content inside their reports - THANK YOU Daniel! You can follow Daniel on LinkedIn, Twitter, his Blog, or show your support by sponsoring him on GitHub!
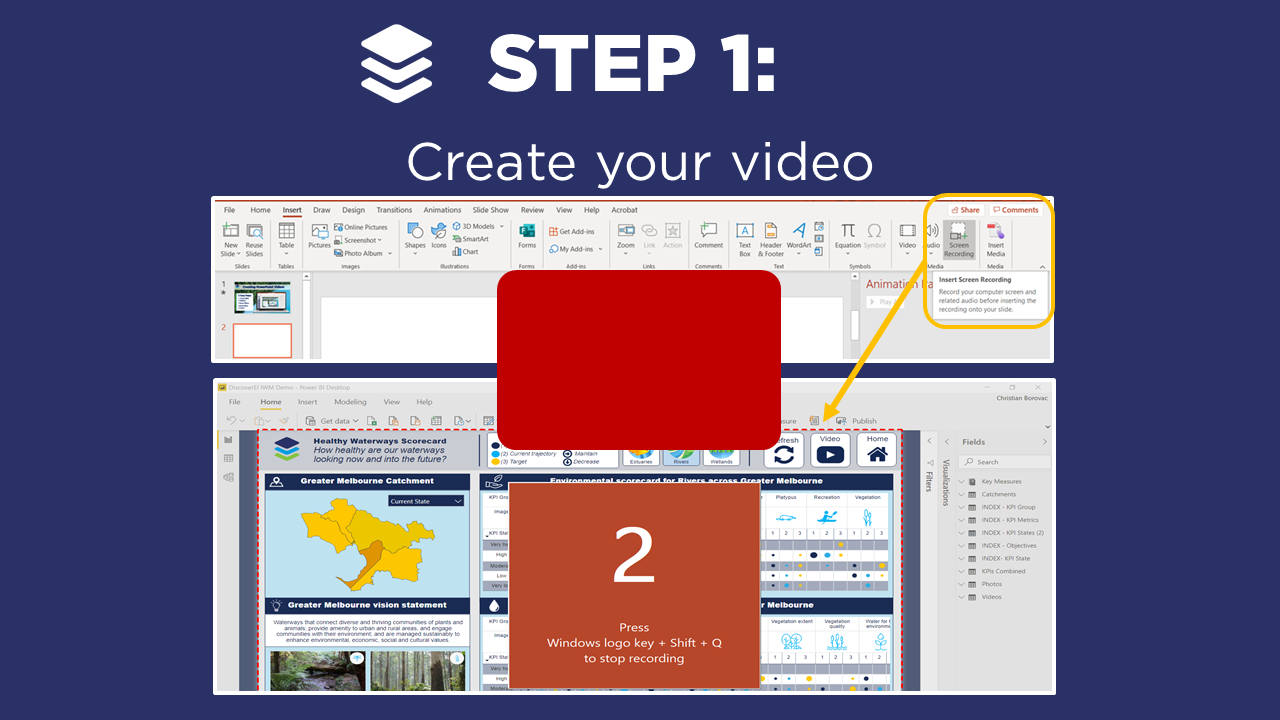
STEP 1: Create Videos
There are loads of great tools out there to help us make our own videos! A simple screen recording with a couple of text boxes and some fun music can often do the trick to share your message and insights! One of the easiest tools to screen record videos is PowerPoint, and we have a great blog post on this which goes into all the details.
Other screen recording tools that are worth looking into include: Filmora; Camtasia and Screencastify. Of course with the incredible quality of modern day smartphones, its also easy enough to record fantastic videos using your phone (thank you Apple)!
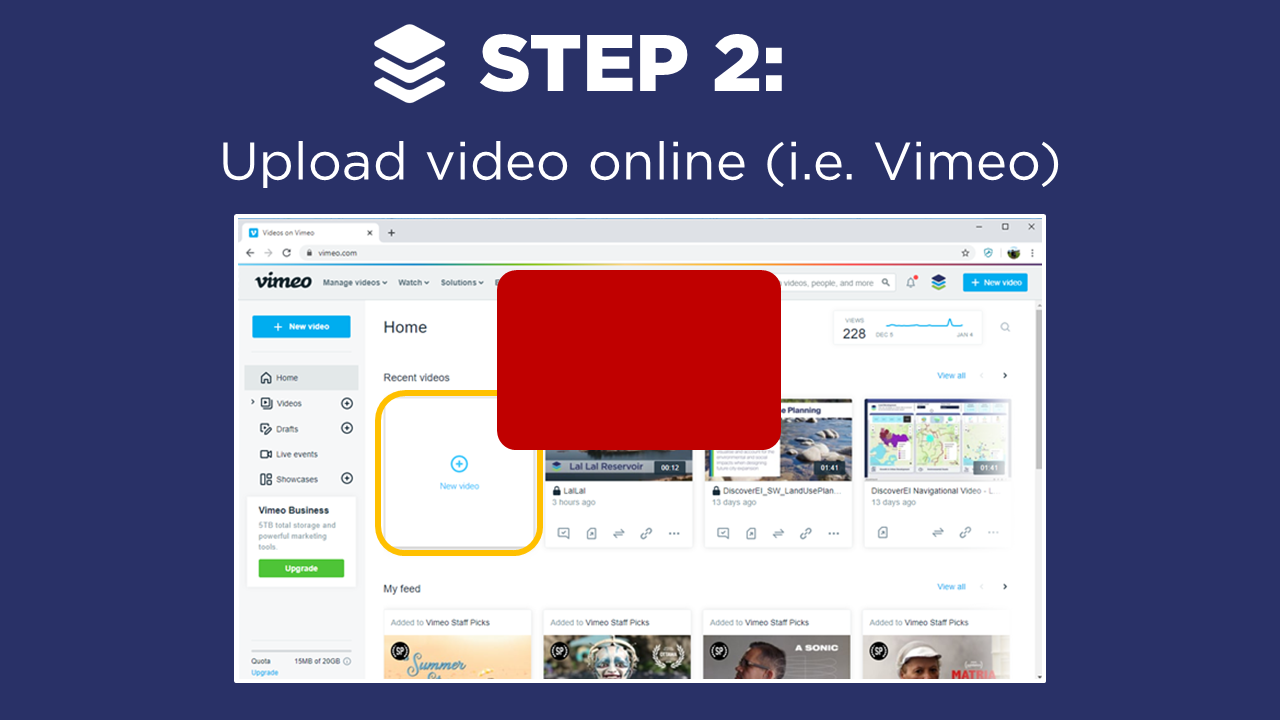
STEP 2: Upload Videos
Now that we have created our videos, the next step is to host them online to create our video file links. While there are lots of platforms out there for video hosting, we like to use Vimeo. All you have to do in this step is upload your video online!
And that’s it!
STEP 3: HTML Code
Now that we have hosted our videos online, the next step is to wrap our video links inside of some HTML (so we can use it in the HTML Viewer inside of Power BI). Now you may be thinking ‘Slow down here…I don’t know the first thing about HTML…and I kinda don’t want to either!’. But trust us, you don’t have to be a coding guru, just follow a couple of easy steps:
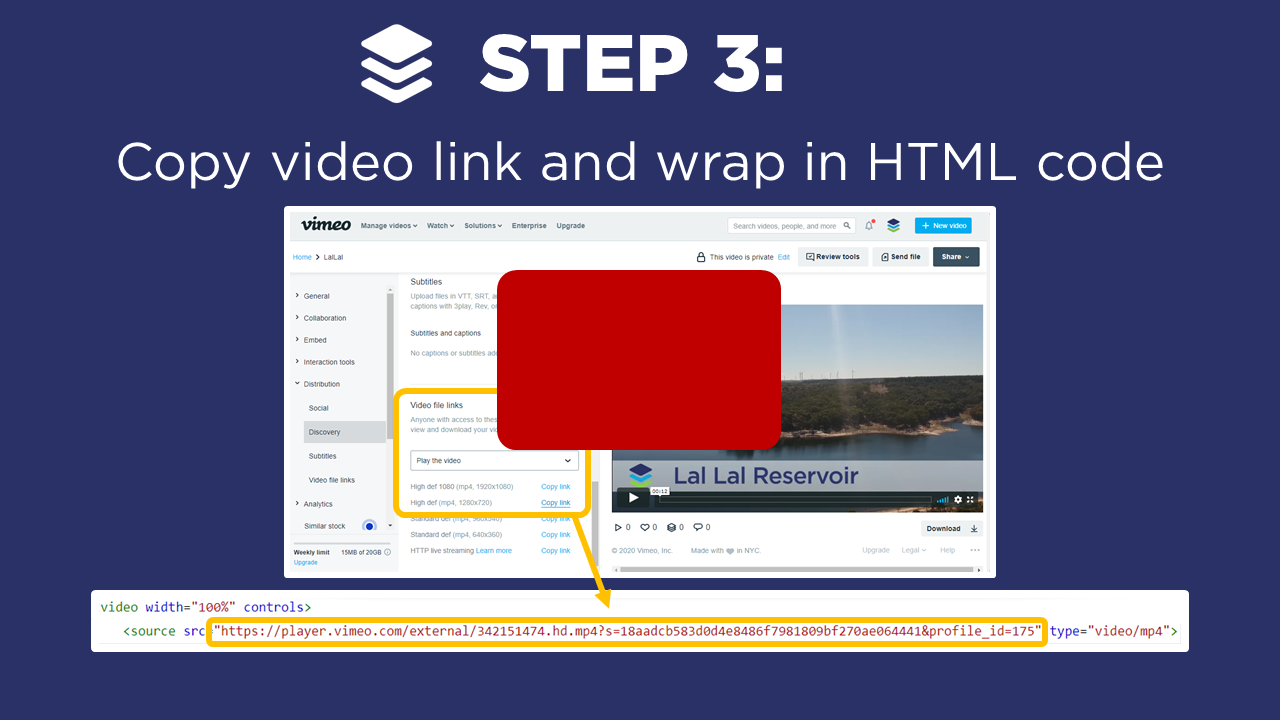
Copy the video link from Vimeo:
Navigate to Distribution, select Video File Links and copy the link for the selected resolutions.
Note: There are lots of other video link options available in Vimeo such as standard link, embed code, download link… in our experience none of these options work, it needs to be the Video File Link! Happy to be proven wrong…
Wrap the video link in some HTML tags:
Turn your video link into HTML by combining some simple tags. We typically stitch together the code using basic Excel formulas (see the video for an example), and we have an example below:
<video width="100%" controls><source src="Enter your Vimeo file link here" type="video/mp4">
EXAMPLE CODE:
<video width="100%" controls><source src="https://player.vimeo.com/external/342151996.hd.mp4?s=2c6248ed2778f61c81ec49df1ecc28ed6caa47e7&profile_id=175" type="video/mp4">
And that is how its done - now you’re ready to take the next step and bring this into Power BI!
Note: At this stage we have not been able to successfully embed YouTube hosted videos. If anyone’s successfully done this we would love for you to share your tricks!
STEP 4: Add to Power BI
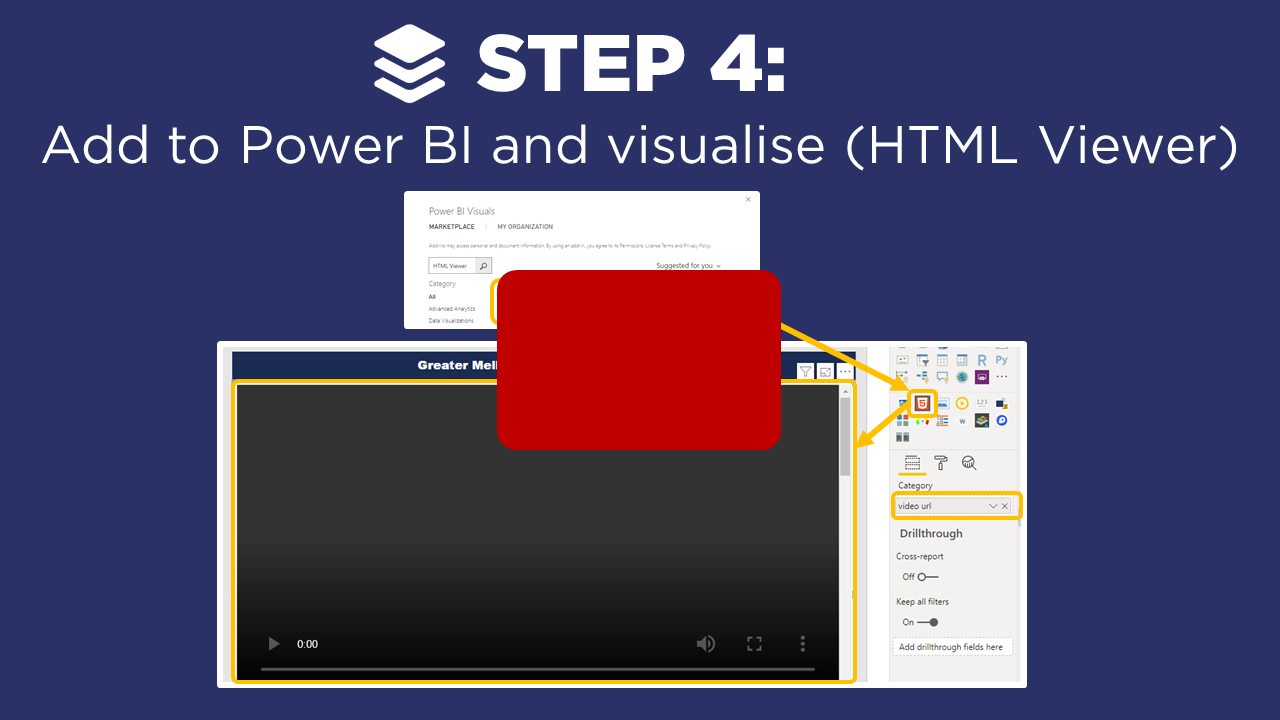
Now that we have our Video links wrapped up inside of HTML code, the next step is to import this into our Power BI data model and embed videos inside of our Power BI reports using the HTML Content (previously HTML Viewer) custom visual.
The key steps are:
Import the dataset into your Power BI model (as usual).
Import the HTML Content custom visual from the Power BI MarketPlace.
Drag in the HTML code into the Category field and correct the formatting.
And there you have it, videos in your Power BI reports through the HTML viewer.
But why is my screen black ? Well, unfortunately, we can’t view the videos in the Power BI Desktop - they only work in the Power BI Service or reports shared online. This is a bit of a limitation for now, but rumour has it that Power BI is migrating to be totally online in the not too distant future…
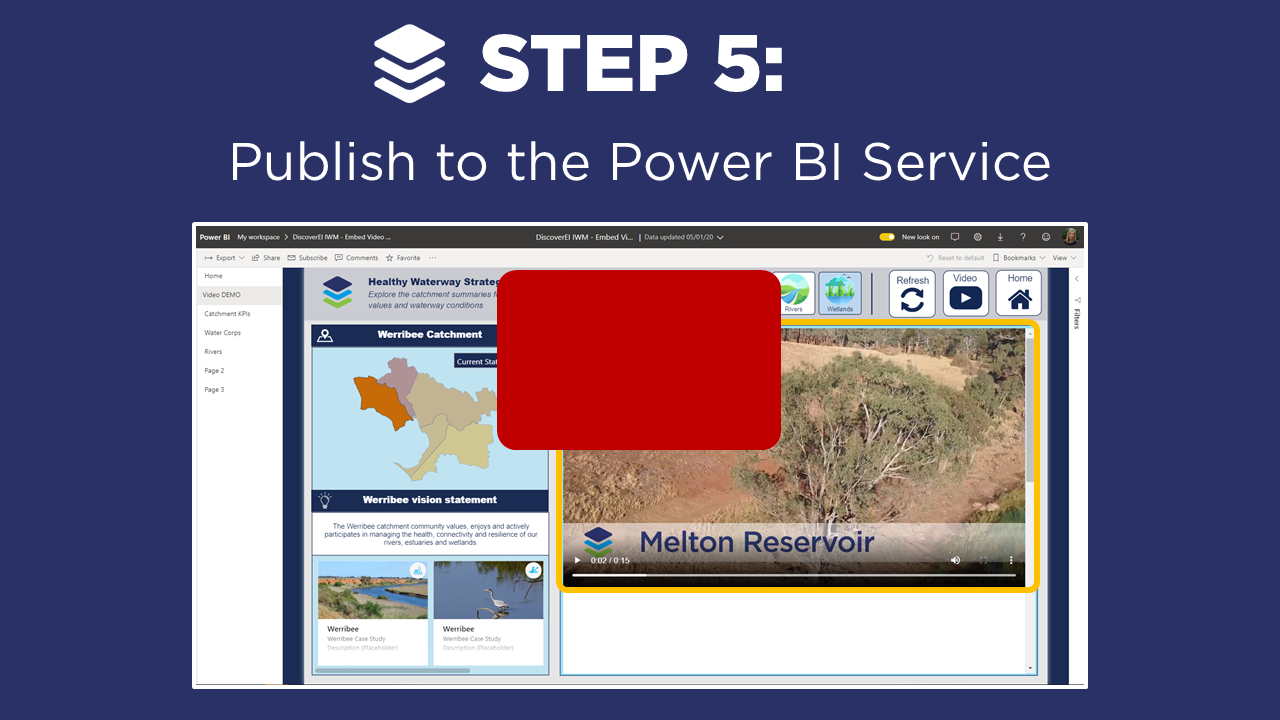
So lets publish our reports and see how they look!
STEP 5: Publish Online
The last step is to Publish the report online to the Power BI Service - and press play!
A couple of things that we have learned about embedding videos:
Use Bookmarks: Videos can often take up a lot of your precious report real-estate. So we often use Bookmarks to Show/Hide videos.
Viewing Offline: At the time of this post, videos only work in the HTML viewer when viewed in the Power BI Service or as a Power BI web link, so they can’t be viewed offline. A good alternative is to embed GIFs if required to be viewed offline.
Slow loading time: Large videos may take a long time to load, and therefore can reduce your report performance. It’s always a good idea to consider the video resolution, or do a lazy load using Bookmarks.
Report users can make the connection to each reservoir by embedded drone footage
Using videos and GIFs to explain the context of various pipe distribution networks and water supply systems
Embed videos to explain how to navigate your report, or in our case how to build a water resources model.





Do you want to learn how to design engaging and intuitive Power BI reports, which communicate your key insights at a glance and tell your data story?
Our two-day Power BI training course is designed specifically for Power BI Professionals and Data Analysts, and provides our best practice tips, tricks and hacks to help you transform your data! We provide this course online, in-person group sessions, or customised in-house training for your team. Places are limited (max 8 participants per class) so secure your spot today!